


Blog
How to Connect and Test an RFID Card Dispenser Before Kiosk Integration?

Overview
An RFID card dispenser should be tested on the bench before it is mounted inside a hotel kiosk, access control terminal, parking machine, visitor management kiosk, membership card terminal, or OEM self-service system.
The first test is not only about proving that one card can come out.
For an integrator, the real question is:
**Can the dispenser communicate with the host, move the card to the correct position, read or write the RFID card, report useful status, and recover from a failed transaction without leaving the kiosk in an unknown state?**
That is the difference between a simple hardware demo and a card issuing subsystem that is ready for project integration.
This guide explains how to connect and test an RFID card dispenser using a practical engineering workflow. It covers power, RS232 communication, test software, card movement, RFID read/write checks, error handling, and the validation points that matter before mass deployment.
Quick Answer
To connect and test an RFID card dispenser, prepare a Windows PC, the correct RS232 or USB communication cable, a stable 24V DC power supply, compatible 13.56MHz RFID cards, and the model-specific SNRO test software or protocol tool.
Start with power and communication checks. Then query device status, move one card through the card path, stop the card at the RFID read/write position, test card reading, test writing only with safe test cards, and verify ejection, retraction, or fail-card collection if the model supports those functions.
Before using the dispenser in a real kiosk, repeat the test with the actual project cards, final host system, enclosure mounting, output slot, and recovery logic.
Why This Technical Topic Matters
RFID card dispenser problems usually appear in four places:
– Electrical connection
– Serial communication
– Card path movement
– Software recovery logic
The mechanical part may look fine during a short demo. The trouble starts when the dispenser is installed behind a front panel, connected to the final kiosk controller, loaded with real cards, and controlled by application software that has to make decisions after every timeout or failed card movement.
In real projects, a failed card issuing event can create more than a bad user experience.
– In a hotel kiosk, a guest may not receive the room key after check-in.
– In an access control kiosk, a visitor credential may be issued but not recorded correctly.
– In a parking terminal, a driver may be blocked at entry or exit.
– In a membership terminal, card inventory may no longer match software records.
– In a reusable card system, an uncollected card may need to be retracted, revoked, or collected.
A good first test therefore checks the complete card issuing behavior, not only the motor.
**Field note:** If the demo software can dispense one card but your host application cannot identify where the card is after a fault, the project is not ready. The software state machine is part of the dispenser integration.
System Requirements
Before starting, prepare the test environment carefully. Most first-test problems come from loose assumptions around power, serial port settings, card type, or software version.
Hardware and tools
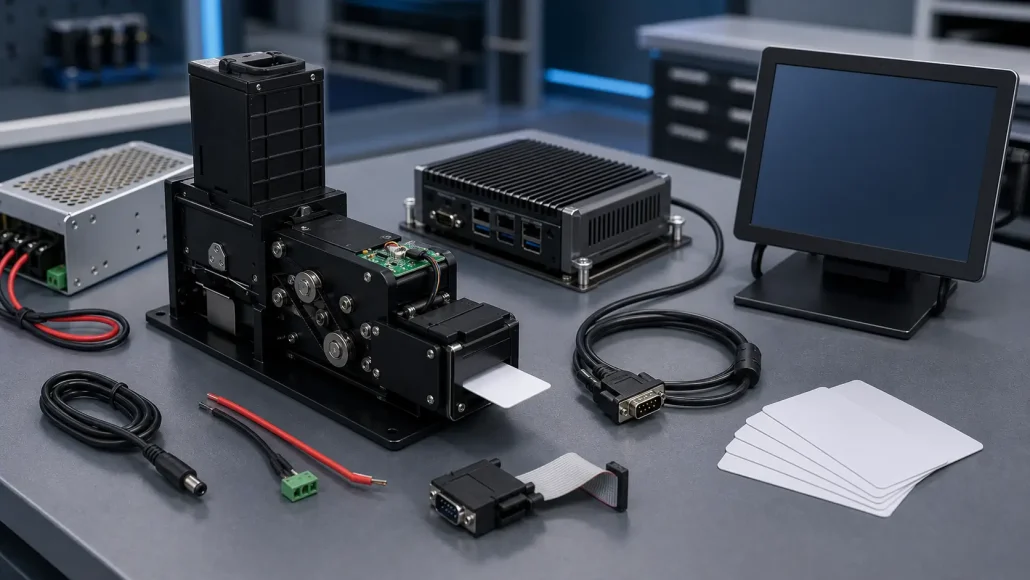
Prepare:
– RFID card dispenser module
– Windows PC for first bench testing
– Native RS232 port or USB-to-RS232 converter
– Correct RS232 cable or model-specific communication cable
– Stable 24V DC power supply, commonly 24V / 3A for many bench test setups
– Compatible RFID cards
– SNRO test software or the correct model test utility
– Datasheet, wiring note, or communication protocol document
– Clean bench space for card output and recovery
For production evaluation, also prepare:
– Real project cards
– Final kiosk controller or industrial PC
– Target operating system image
– Final power supply or power distribution board
– Kiosk front-panel output slot sample
– Mechanical mounting bracket or prototype enclosure
Card requirements
RFID card testing must use cards that match the reader and dispenser configuration.
Many RFID card dispenser projects use 13.56MHz contactless cards. Depending on the selected model and RFID module, supported card types may include ISO14443 Type A / B and common Mifare-compatible cards such as S50 or S70.
Before testing, confirm:
– Card size
– Card thickness
– Card material
– Surface coating
– RFID frequency
– Chip type
– Read-only or read/write requirement
– Key or authentication requirement
– Whether the final card is blank, pre-encoded, or already managed by another system
Do not judge a dispenser using only a random office RFID card. Use the real project card as early as possible.
Preparation
Confirm what the dispenser is expected to do
Before connecting cables, define the expected workflow.
Some projects only need card output. Others need the card to stop at a read/write position, write data, verify the data, present the card to the user, and collect the card if something fails.
Check whether the selected dispenser supports:
– Card dispensing
– RFID card reading
– RFID card writing or encoding
– Card stop at read/write position
– Front card output
– Front card insertion
– Card retraction
– Fail-card collection
– Empty card detection
– Low-card warning
– Card position feedback
– RS232, USB, or another host interface
This step prevents a common mistake: testing the dispenser as if it were a simple motor, then discovering later that the real application needs status feedback and card recovery.
Confirm power input
Check the model datasheet before applying power.
Many RFID card dispenser modules use 24V DC power. A 24V / 3A supply is often used for bench testing, but the exact requirement depends on the model, motor load, and selected configuration.
Before power-on:
– Confirm positive and negative polarity.
– Confirm connector type and pin definition.
– Make sure the connector is fully seated.
– Avoid thin temporary wires for motor current.
– Do not share a weak bench supply with other motors.
– Keep the card path clear during initialization.
Weak or unstable power can look like a mechanical fault. If the dispenser moves partway, resets, or reports inconsistent status, check the power supply before blaming the card path.
Confirm communication settings
For RS232 testing, connect the PC and dispenser using the correct serial cable.
If the PC does not have a native DB9 port, use a USB-to-RS232 converter. After plugging it in, check Windows Device Manager and write down the COM port number.
Record these settings before opening the test software:
– COM port
– Baud rate
– Data bits
– Stop bits
– Parity
– Flow control
– Protocol format, such as hexadecimal command or model-specific frame
If the test software opens the wrong COM port, the dispenser will look dead even when the hardware is fine.
Integration Workflow
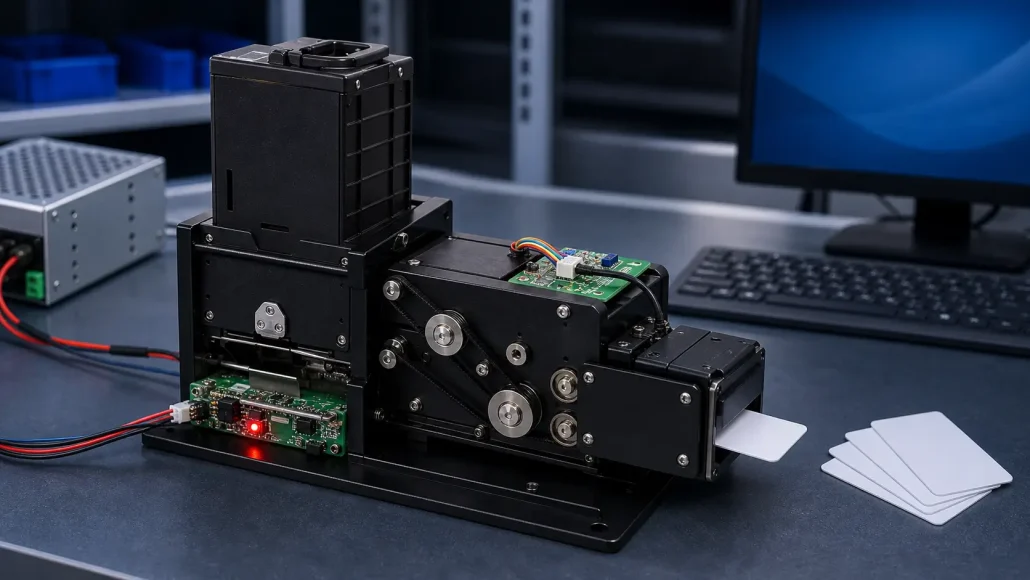
Step 1: Power on the RFID card dispenser
Connect the power cable according to the wiring label or manual. Then power on the 24V DC supply.
Observe the module before sending commands.
Check:
– Does the device initialize normally?
– Is there any abnormal motor sound?
– Is a card already inside the path?
– Is the card box or hopper installed correctly?
– Does any indicator show fault or ready status?
If the device does not initialize, stop. Recheck voltage, polarity, connector seating, and current capacity.
Step 2: Connect RS232 or USB communication
Connect the communication cable between the PC and the card dispenser.
For RS232:
– Confirm the cable is the correct type.
– Confirm the COM port in Windows.
– Confirm that no other software is using the same port.
– Confirm serial parameters match the protocol document.
For USB:
– Confirm driver installation.
– Confirm whether the device appears as a virtual COM port or USB device.
– Confirm the test software supports the selected USB mode.
In many projects, RS232 remains a practical first-test interface because it is transparent and easy to debug.
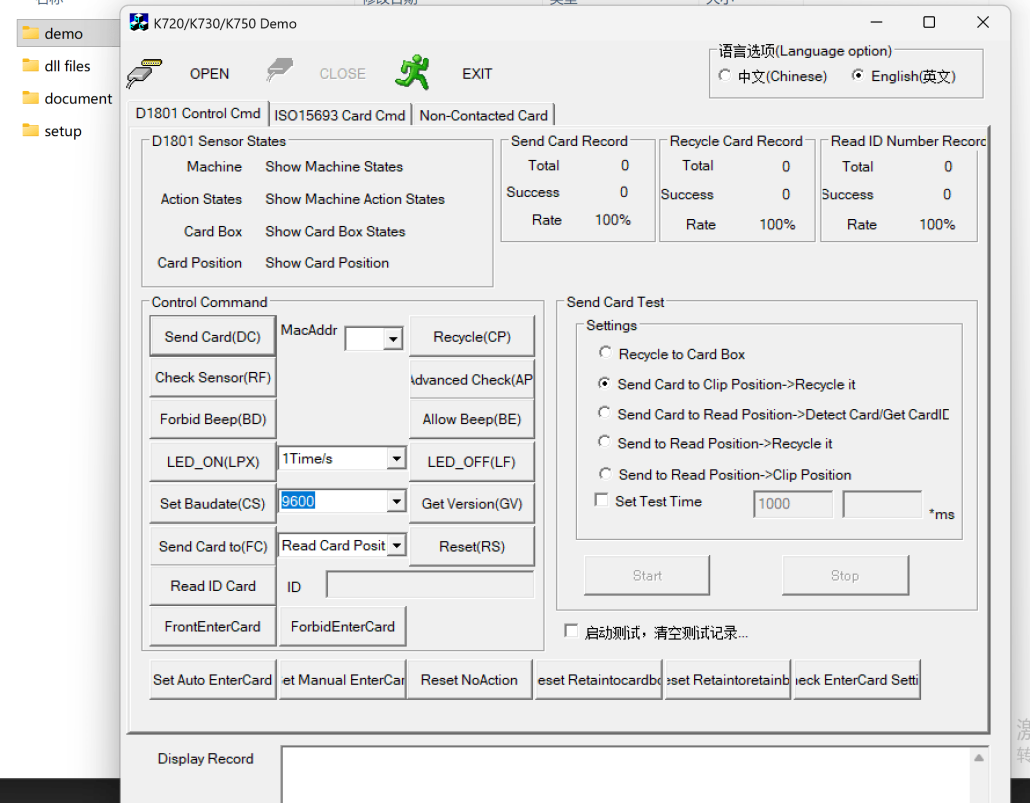
Step 3: Open the test software and query status
Launch the SNRO test software or the model-specific demo utility.
Select the correct COM port and communication settings. Then open the port and query the device status.
Do not start with a dispense command. First confirm that the software and device can talk.
A clean first response should tell you that communication is working and that the mechanism is in a known state.
Recommended first checks:
– Open serial port
– Query device status
– Check card position
– Check hopper or card box status
– Check whether a card is blocking the transport path
– Check whether the module reports ready state
If the software cannot connect, troubleshoot communication before testing card movement.
Step 4: Test card movement through each position
Once communication is stable, test one card through the full path.
A practical first sequence is:
1. Feed one card from the card stack, hopper, or card box.
2. Move the card into the internal card path.
3. Stop the card at the RFID read/write position.
4. Hold the card long enough for a read or write operation.
5. Move the card to the front output position.
6. Present or eject the card to the user side.
7. If supported, insert a card from the front slot.
8. If supported, retract or collect the card to the fail-card bin.
Watch the card, not only the software window.
Look for:
– Skewed card entry
– Double card feed
– Slow movement
– Roller slipping
– Card stopping short of the target position
– Abnormal motor sound
– Card not fully presented at the output slot
– Status feedback that does not match the physical card position
**Field note:** A card dispenser that works without the kiosk front panel may fail after the front panel is installed. Output-slot alignment should be tested before enclosure design is frozen.
Step 5: Test RFID card reading
Move the card to the RFID read position and run the read command.
Depending on the software and card type, the test may read:
– UID
– Card type
– Sector or block data
– Application-specific card data
A useful read test should be repeatable. The same card should return stable results without manual pushing, tilting, or repositioning.
Confirm:
– The card is stopped at the correct RF position.
– The RFID card standard is supported.
– The reader detects the card consistently.
– The software receives clear data.
– Read failure is reported as an error, not ignored silently.
If card movement is stable but RFID reading fails, check the card type, frequency, chip, antenna position, orientation, and any authentication requirement.
Step 6: Test RFID writing or encoding
Only test writing with safe test cards.
Do not write to customer cards, live hotel key cards, live access cards, encrypted cards, or production credentials unless the project team has approved the test method.
For writable test cards:
1. Move the card to the read/write position.
2. Authenticate if required.
3. Write a simple test value.
4. Read the same data back.
5. Compare the result.
6. Decide whether the card should be issued, retried, or rejected.
For real deployments, write success alone is not enough. The application should use read-after-write verification before presenting the card to the user.
Step 7: Test failed-card handling
This is where many integrations are weak.
A kiosk application must know what to do when the card cannot be read, cannot be written, is not taken, or is left inside the machine.
Test available recovery actions:
– Return card to output
– Move card to fail-card bin
– Retract uncollected card
– Reset the mechanism
– Query current card position
– Clear error state after manual service
– Resume operation after power interruption
For hotel, access control, parking, and membership applications, failed-card handling is also a security and inventory issue.
The software should record whether the card was issued, rejected, collected, or left in an unknown state.
Step 8: Repeat the test with real cards
One successful issue cycle does not prove integration readiness.
Run repeated cycles with the real project cards.
A sensible validation path is:
– Short bench test: 20 to 50 cycles
– Prototype test: longer repeated cycles with the final host application
– Enclosure test: repeated cycles after the dispenser is mounted inside the kiosk
– Pre-production test: full workflow test with real cards, real software, and service procedure
Record each abnormal event, including the card used, command sent, software response, physical card position, and recovery action.
Low-frequency failures matter in unattended kiosks because the machine may run for months with limited operator access.
Common Interfaces
RS232
RS232 is widely used in embedded kiosk modules because it is stable, simple, and easy to debug.
For RS232 integration, confirm:
– Connector type
– Pin definition
– Voltage level
– Baud rate and frame settings
– Cable length
– Grounding
– Host controller serial port availability
– Error-code format
– Command and response timing
RS232 problems are often basic: wrong COM port, wrong cable, wrong baud rate, poor grounding, or a USB converter driver issue.
USB-to-RS232 converter
A USB-to-RS232 converter is acceptable for bench testing when the PC has no native serial port.
Use one reliable converter and keep it consistent during validation. Changing converter models during debugging can hide the real cause of a communication problem.
For mass deployment, test on the actual kiosk controller instead of relying only on an engineering laptop.
USB
Some card dispenser configurations may support USB directly.
USB can simplify PC testing, but final project approval still depends on driver support, operating system compatibility, device detection after reboot, and application-level recovery after disconnect or power loss.
SDK / API Notes
The test software proves basic device function. It does not replace the final kiosk application.
After the first bench test, the software team should work from the SDK, protocol document, or command set and build a controlled card issuing state machine.
A practical application sequence should include:
1. Query device status.
2. Confirm card stock.
3. Confirm no card is stuck in the path.
4. Feed one card.
5. Move card to RFID position.
6. Read or write card data.
7. Verify the result.
8. Present the card.
9. Confirm pickup or timeout.
10. Record transaction result.
11. Recover safely after failure.
Avoid a single blind “dispense card” command in the application. It may work in a demo, but it is not enough for unattended operation.
Operating System Considerations
First testing is often done on Windows because many demo tools are Windows-based.
Final kiosk systems may use:
– Windows
– Linux
– Android
– Industrial PC middleware
– Embedded controller software
Before selecting the dispenser for production, confirm:
– SDK support for the target operating system
– Whether direct protocol integration is possible
– Serial port permissions and driver behavior
– Service startup after reboot
– Device reconnection after power loss
– Logging and remote monitoring requirements
If your final kiosk runs Linux or Android, treat the Windows test as hardware verification only. It does not prove final software compatibility.
Error Handling
A serious integration should define every important exception before field deployment.
Common error conditions include:
– No card available
– Low-card warning
– Card box or hopper not seated
– Card feed failure
– Double feed
– Card stopped before RFID position
– RFID read failure
– RFID write failure
– Card not taken by user
– Card blocked at output
– Card moved to fail-card bin
– Communication timeout
– Power loss during movement
– Unknown state after software restart
For each exception, define:
– What the dispenser reports
– What the host application records
– Whether the card can be retried
– Whether the card must be rejected or collected
– Whether access or value should be activated
– Whether inventory should change
– Whether staff must service the kiosk
– What the user should see on screen
This is where project experience matters. The card dispenser is only one component. The full system decides whether a failed issue becomes a small retry or a service ticket.
Deployment Reality
Bench testing is useful, but it is not the final proof.
Before production, test the dispenser inside the real mechanical and software environment.
Mechanical installation
Check:
– Output slot alignment
– Card clearance at the front panel
– Mounting rigidity
– Cable routing
– Service door access
– Card loading access
– Fail-card bin access
– Clearance for cleaning rollers and removing jammed cards
Do not let industrial design close the card path too early. A beautiful front panel can still create a bad card exit angle.
Card stock and environment
Test the exact cards that will be used in the project.
Check how the dispenser behaves with:
– New cards
– Slightly worn cards
– Cards with different surface coatings
– Cards after humidity exposure
– Full card stack
– Low card stack
– Cards from different production batches
Card friction changes more than many teams expect. That is why final card stock should be part of validation, not a later purchasing detail.
Software workflow
The final software should test the complete business process.
For a hotel kiosk, that may include:
– PMS approval
– Room assignment
– RFID encoding
– Read-back verification
– Key card presentation
– Pickup confirmation
– Receipt printing
– Transaction logging
– Failed-card recovery
For an access control kiosk, it may include:
– Visitor approval
– Credential assignment
– RFID UID reading
– Access permission activation
– Pickup confirmation
– Audit log
– Revocation if the card is retracted
Testing only the dispenser motor misses the real risk.
Maintenance workflow
A card dispenser project should also test service work.
Ask:
– Can staff load cards without disturbing cables?
– Can failed cards be removed safely?
– Can the fail-card bin be checked without tools?
– Can rollers and card path be cleaned?
– Can the system report low-card status before the kiosk is empty?
– Can the operator reconcile physical cards with software inventory?
Good service access reduces downtime and support cost after deployment.
Troubleshooting
The test software cannot connect to the dispenser
Check the COM port, baud rate, serial cable, USB-to-RS232 driver, and whether another program is using the same port.
Also confirm that the dispenser is powered before opening the port.
The dispenser powers on but does not move cards
Check card loading, card box seating, hopper position, and whether a card is already stuck in the path.
Query device status before sending more movement commands. Repeated commands can make recovery harder if the card is already mispositioned.
The card moves but RFID reading fails
Confirm the card frequency, card standard, chip type, and whether the card is stopped at the correct read/write position.
If UID reading works but data reading fails, the issue may be key authentication, protected memory, or unsupported card format.
RFID writing fails
Use a safe blank test card first.
Check authentication keys, writable memory area, card type, and write protection. Then run read-back verification. If verification fails, do not issue the card.
Cards jam during repeated tests
Check card thickness, surface finish, card stack pressure, roller cleanliness, output slot alignment, and mounting pressure.
If jamming appears only after installation, the enclosure is part of the problem.
The card is issued but inventory is wrong
This is a system workflow issue.
The application should record card ID, issue command, RFID result, pickup status, fail-card routing, and final transaction result. If the system cannot prove which card was delivered, add UID reading or another reconciliation step.
Practical Pre-Deployment Checklist
Use this checklist before moving from bench testing to prototype approval.
– Power input confirmed against datasheet
– Correct power polarity verified
– RS232 or USB communication tested
– COM port and baud rate recorded
– Test software connects reliably
– Device status query works
– Card box or hopper status is readable
– Card moves from storage to RFID position
– RFID card can be read repeatedly
– RFID write test passes read-back verification, if writing is required
– Card can be presented to the output slot
– Failed card can be rejected or collected, if supported
– Real project cards are tested
– Multiple-cycle test is completed
– Final operating system support is checked
– SDK or protocol document is available
– Error codes are mapped to application actions
– Enclosure output slot is tested
– Card loading and service access are reviewed
– Inventory and transaction logging are defined
Recommended SNRO Card Dispenser Directions
SNRO supplies RFID card dispenser and card issuing hardware for self-service kiosk projects. Final selection should be based on card type, card capacity, interface, RFID function, software environment, enclosure space, service access, and deployment quantity.
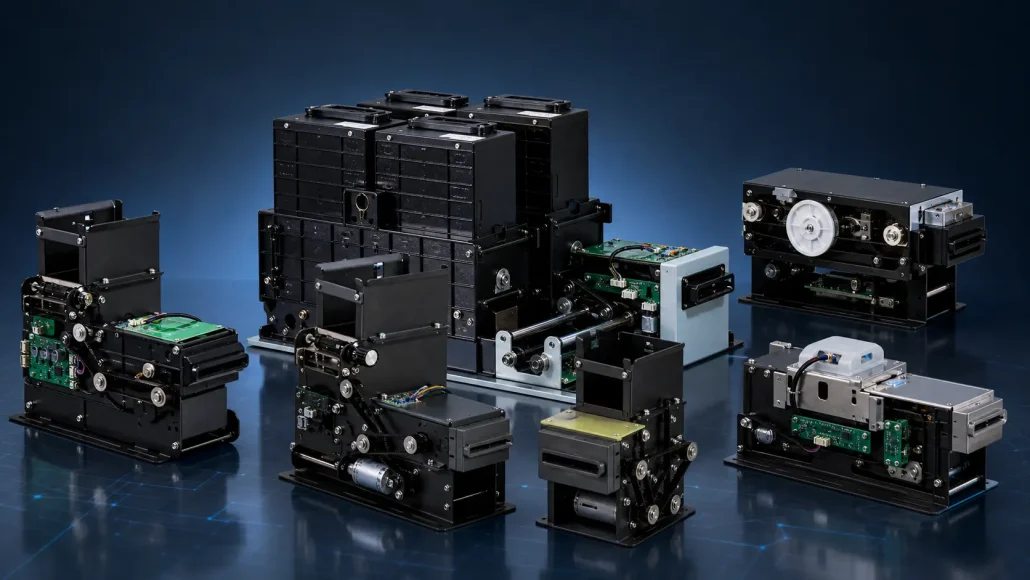
For RFID card issuing projects, integrators may evaluate these directions:
– SNR-K720 RFID Card Dispenser direction for controlled RFID credential issuing workflows.
– SNR-K750-L Card Issuing and Recycling direction for projects that require card issue, card return, reuse, or controlled circulation.
– SNR-CD2604J RFID Card Dispenser direction for applications that need multiple card boxes, selectable card output, RFID read/write, and controlled recovery.
– SNR-CD2616-M8 Mag + IC + RF direction for projects requiring magnetic, contact IC, and contactless IC card operation in one card issuing workflow.
To recommend the correct model, SNRO normally needs:
– Application type
– Card size and thickness
– RFID standard and chip type
– Read-only or read/write requirement
– Required card capacity
– Interface requirement
– Operating system
– Kiosk enclosure space
– Expected project quantity
Need Help Testing an RFID Card Dispenser?
If your team is evaluating an RFID card dispenser for a kiosk or OEM terminal, share the project details before enclosure finalization.
Useful information includes card sample, card thickness, RFID chip type, expected workflow, interface, operating system, required card capacity, and whether the system needs issue-only, read/write, reject, retract, or recycling functions.
SNRO can help your team confirm a suitable card dispenser direction and provide available technical files according to the selected model and project stage.
Request RFID Card Dispenser Test Support
FAQ
What do I need to connect and test an RFID card dispenser?
You typically need a Windows PC, RS232 port or USB-to-RS232 converter, correct communication cable, stable 24V DC power supply, compatible RFID cards, and model-specific test software.
Can I test an RFID card dispenser without a native RS232 port?
Yes. A USB-to-RS232 converter can be used for bench testing. Confirm the driver, COM port, and serial parameters before opening the test software.
What power supply is used for RFID card dispenser testing?
Many RFID card dispenser bench tests use 24V DC power, commonly around 3A for initial testing. Always follow the selected model datasheet because power requirements vary by model.
Which RFID cards should I use for testing?
Use cards that match the dispenser and RFID module specification. Many projects use 13.56MHz cards, including ISO14443 Type A / B or Mifare-compatible cards, depending on model support.
Why can the dispenser move a card but fail to read RFID data?
Common causes include unsupported card type, wrong RFID frequency, card not stopped at the correct read position, antenna alignment, protected card memory, missing authentication key, or mismatched RFID module configuration.
Is the test demo software enough for final kiosk integration?
No. The demo software is useful for bench testing. Final kiosk integration still needs SDK or protocol control, status checks, timeout handling, transaction logging, and recovery logic.
Should I test with real project cards?
Yes. Generic RFID cards are useful for first checks, but final validation should use the real project card stock. Thickness, coating, stiffness, chip position, and card batch can affect feeding and reading.
What should be tested before mass deployment?
Test power stability, communication, card movement, RFID read/write, failed-card routing, real card stock, final host software, enclosure output slot, service access, and inventory reconciliation.
Can SNRO help choose the right RFID card dispenser?
Yes. Share your application, card type, RFID requirement, capacity, interface, operating system, enclosure space, and project quantity. SNRO can help evaluate a suitable card dispenser direction.
Related Resources
– Card Dispenser Hub
– RFID Card Dispenser
– Hotel Key Card Dispenser
– Access Control Card Dispenser Guide
– Card Dispenser SDK Guide
– Common Card Dispenser Failures and Solutions
– Card Dispenser Downloads
– Product Datasheet Request